
How to Get Root Access to Your Sleep Number Bed
Table of Contents
Disclaimer: Following this guide will require modifying internal files on your Sleep Number hub. This will void your warranty and if something goes wrong as a result of this process, you will not receive help from Sleep Number to fix it. There are many ways you can damage your system, through both hardware and software modifications. The author provides no guarantees and you follow this process at your own risk.
As an Amazon Associate, I earn from qualifying purchases. Thank you for your support.
Motivation
I have been interested in exploring the possibility of local network access on my Sleep Number bed for a few years. A while back I created a homebridge plugin for the platform that would let me control some of the settings of the bed through HomeKit or some automations. The "bed presence" value, which indicated whether somebody was in bed or not, was especially nice for running automations such as turning off all the lights or locking the door. However, after running the plugin for a couple years and growing the user base large enough, I received a friendly phone call from corporate Sleep Number asking me to kindly disable the plugin.
You see, I had set the plugin to request data from the SleepIQ API every 5 seconds to get an accurate reading on the bed presence value. Multiply that by the couple thousand users of the plugin at that point and the result was enough strain on their network that they had taken notice and started looking for the cause. They also weren't too fond of the branding of the repository, since to the untrained eye it looked like an official Sleep Number tool, which it definitely was not. Oh well, lessons learned, I shut it down.
This was the motivator for finding a way to access the local network and bypass their servers completely. I passed my learnings from the homebridge plugin to a good friend who restarted that project in a new and improved plugin (which disables the bed presence monitoring by default and included lots of warnings before enabling it) and turned my focus to the hardware.
I cracked open the hub a couple times and looked around for anything obvious. At first, my attention was drawn to the J10 header near the CPU.
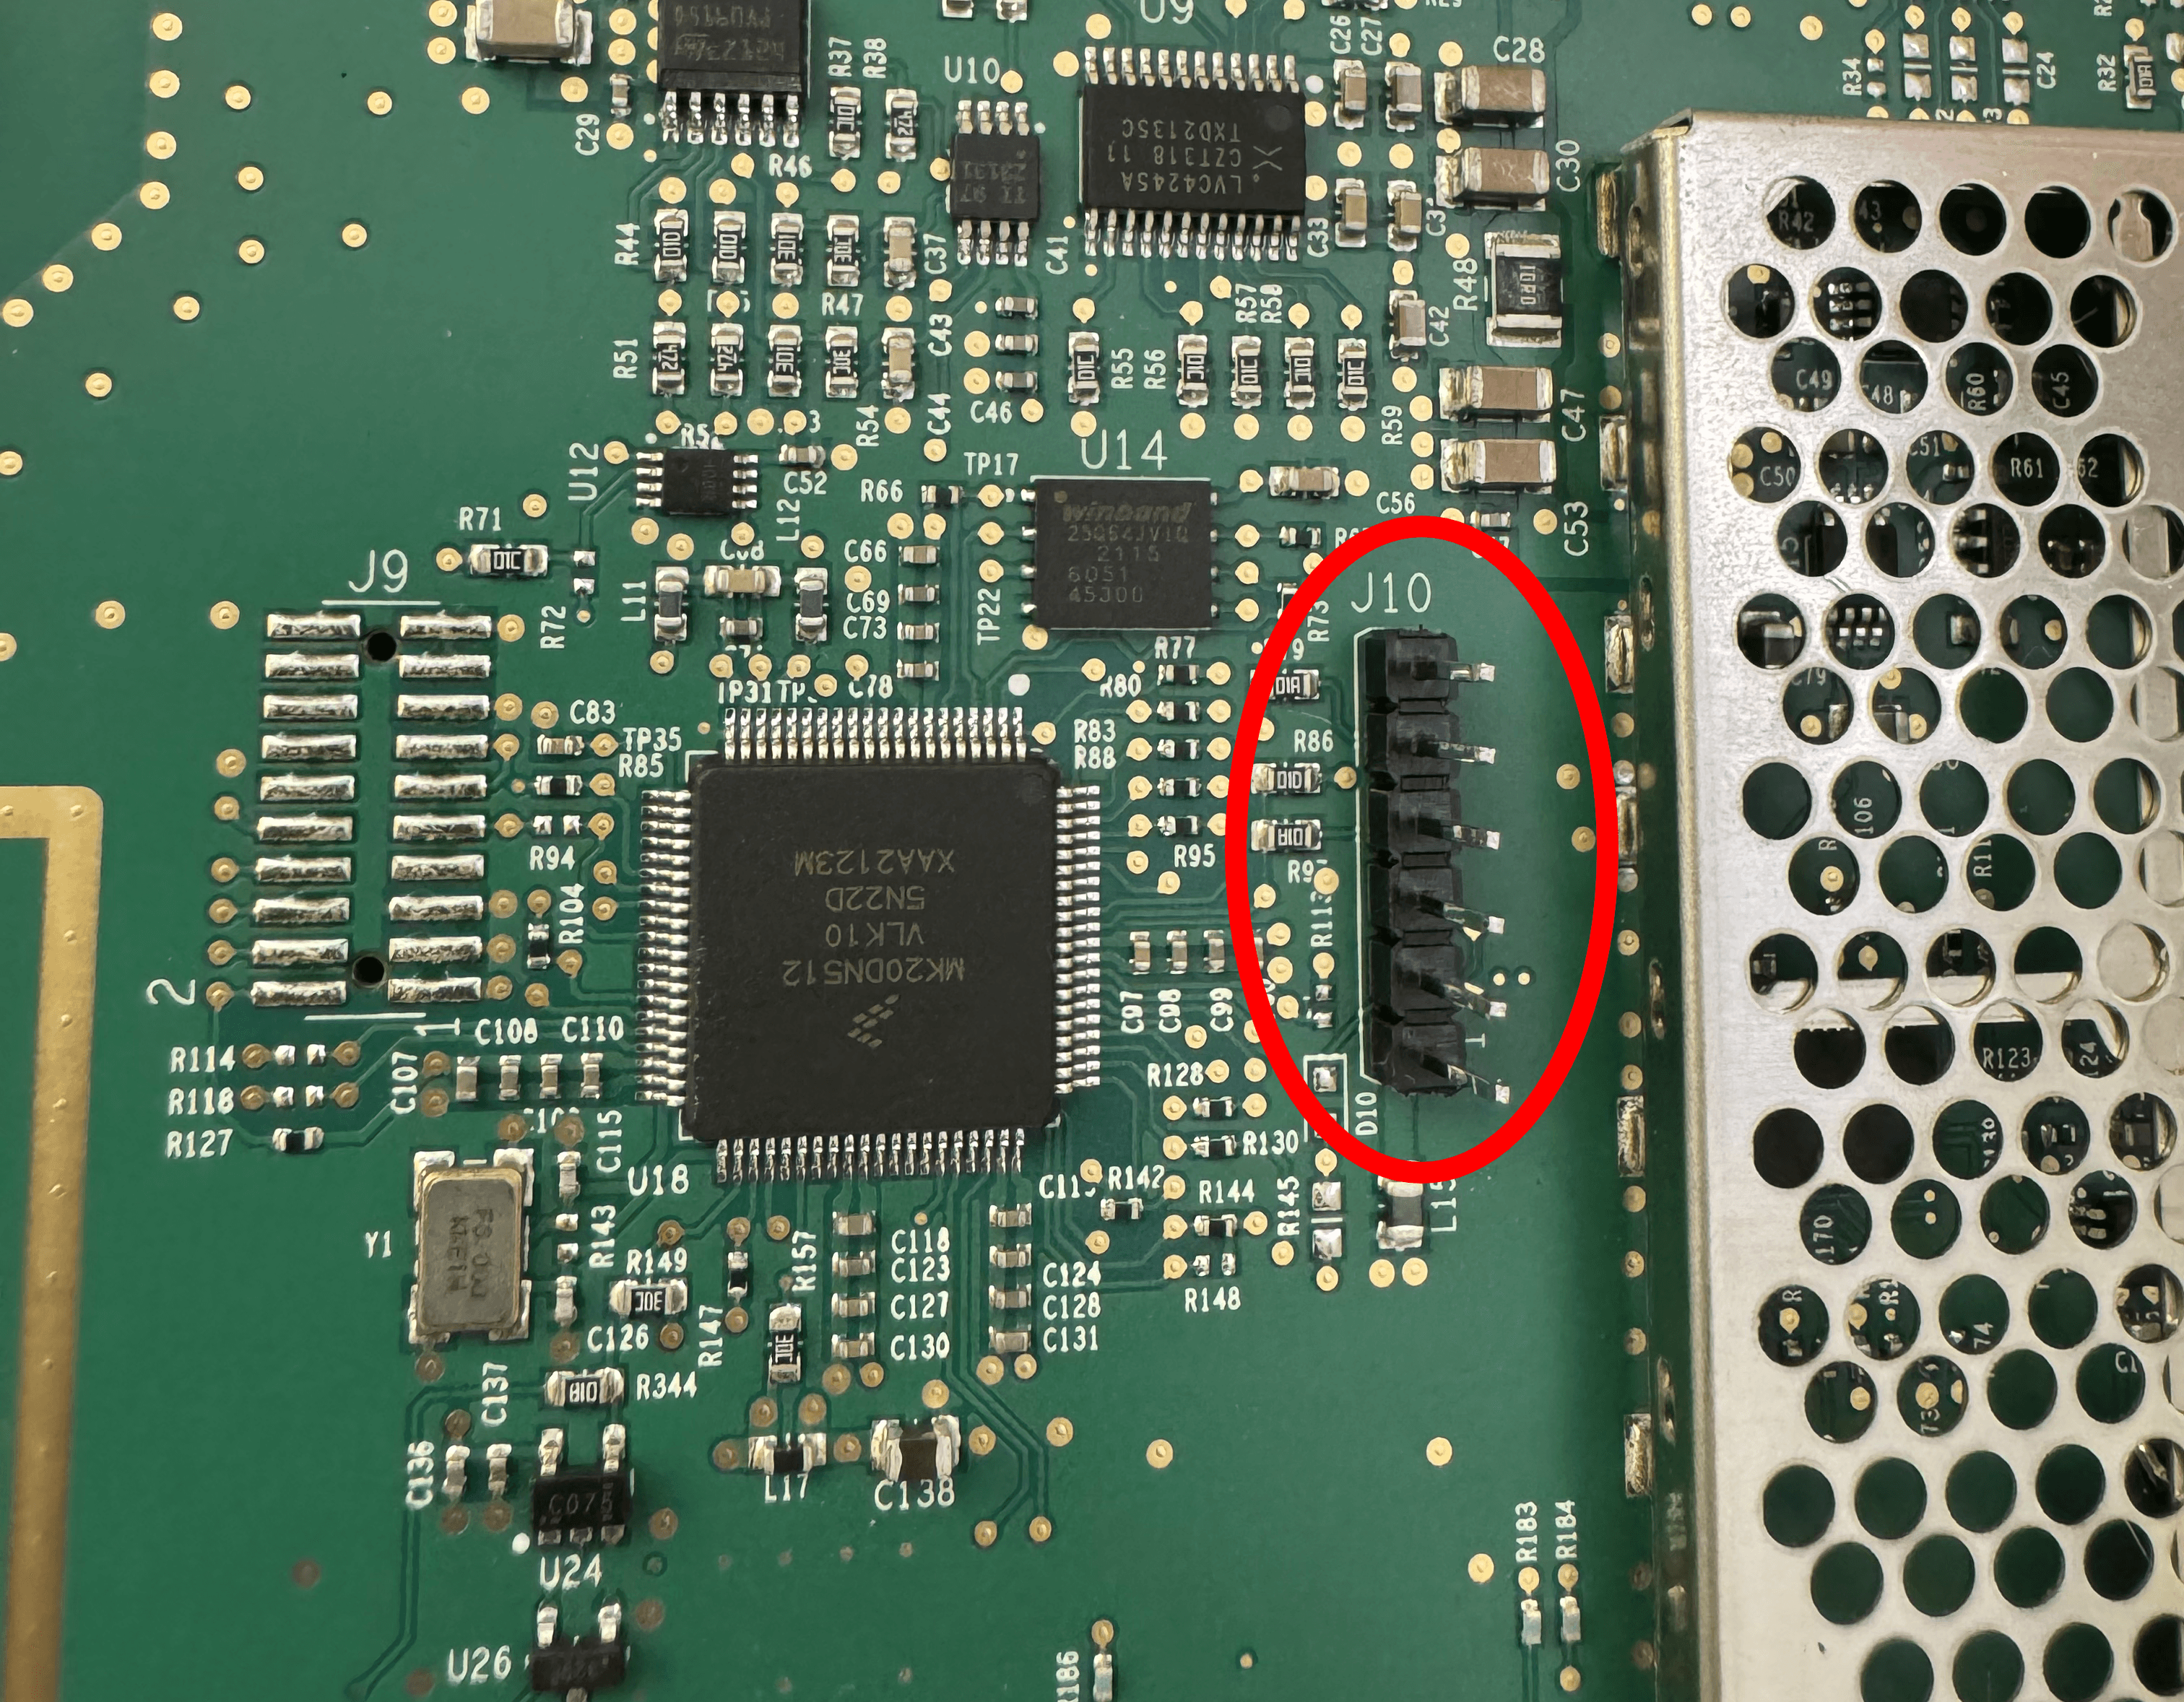
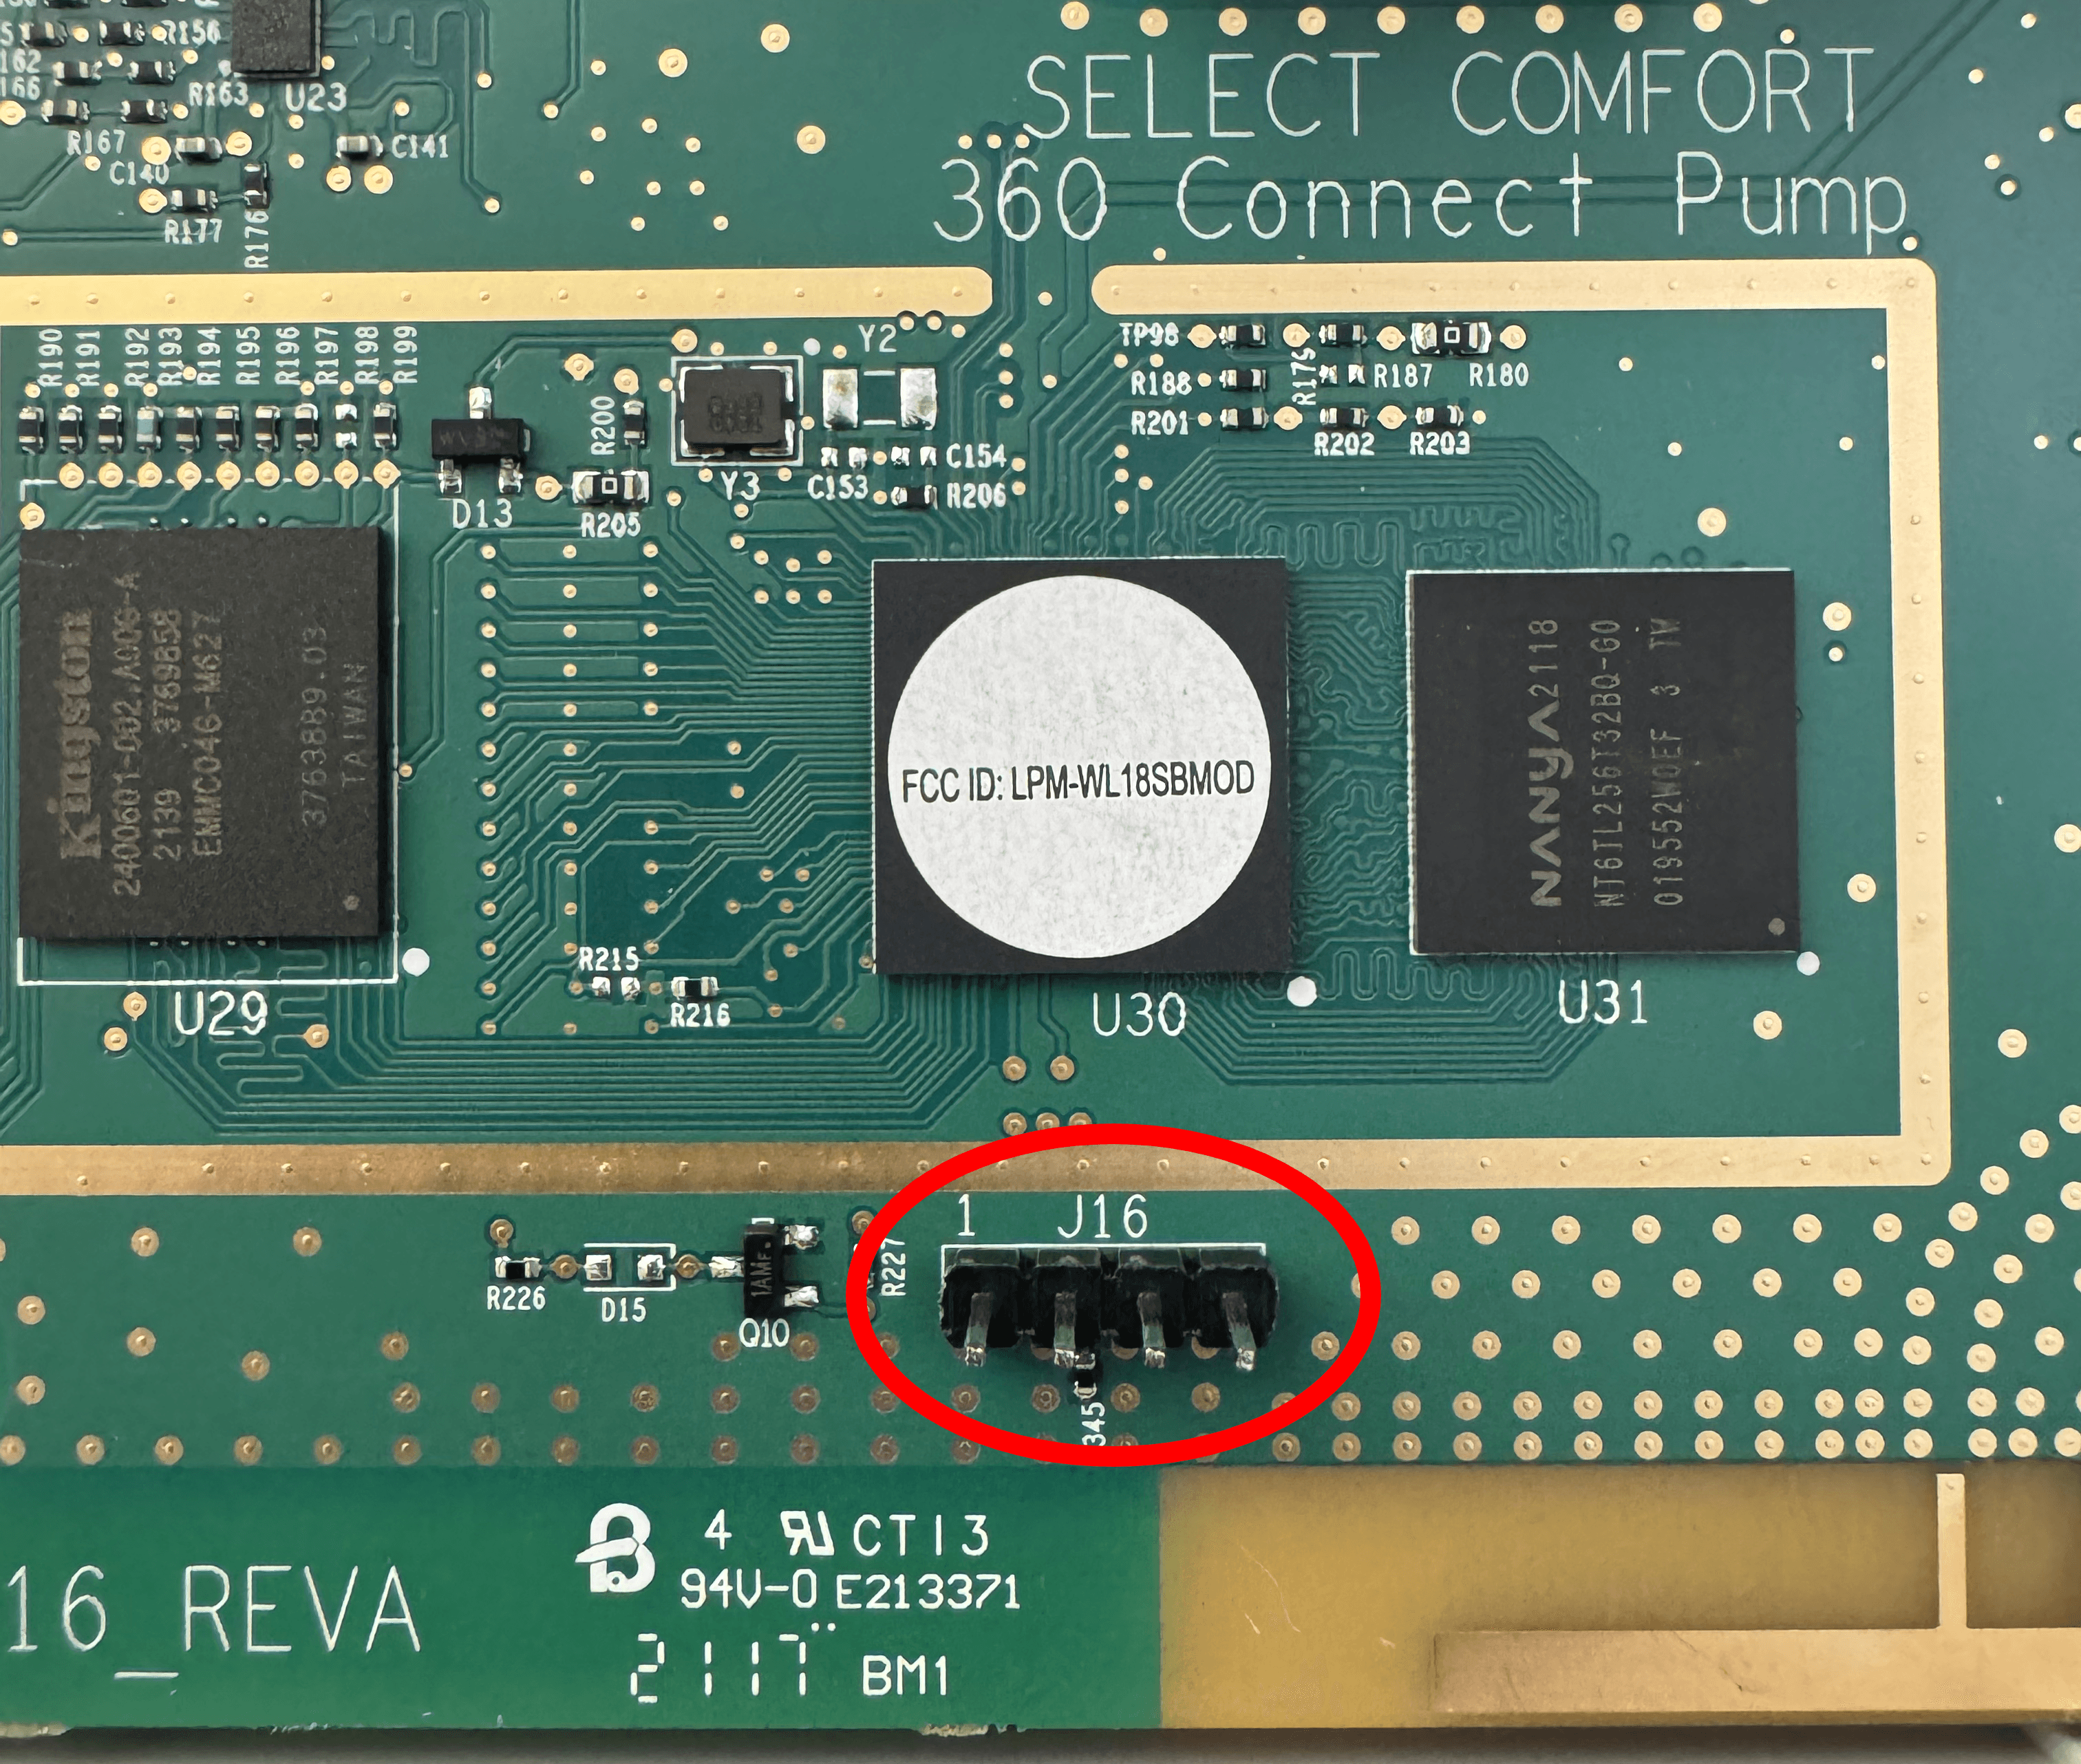
In one CPU configuration, those pins would contain UART lines. However, try as I might, I was never able to get any UART data out. The CPU is in a different configuration. For some reason, I never thought to test the J16 header lower down on the board during my first attempts, but recently I finally took notice of it.
This time I wanted to be sure, so I bought a logic analyzer and connected it to all 10 available header pins.
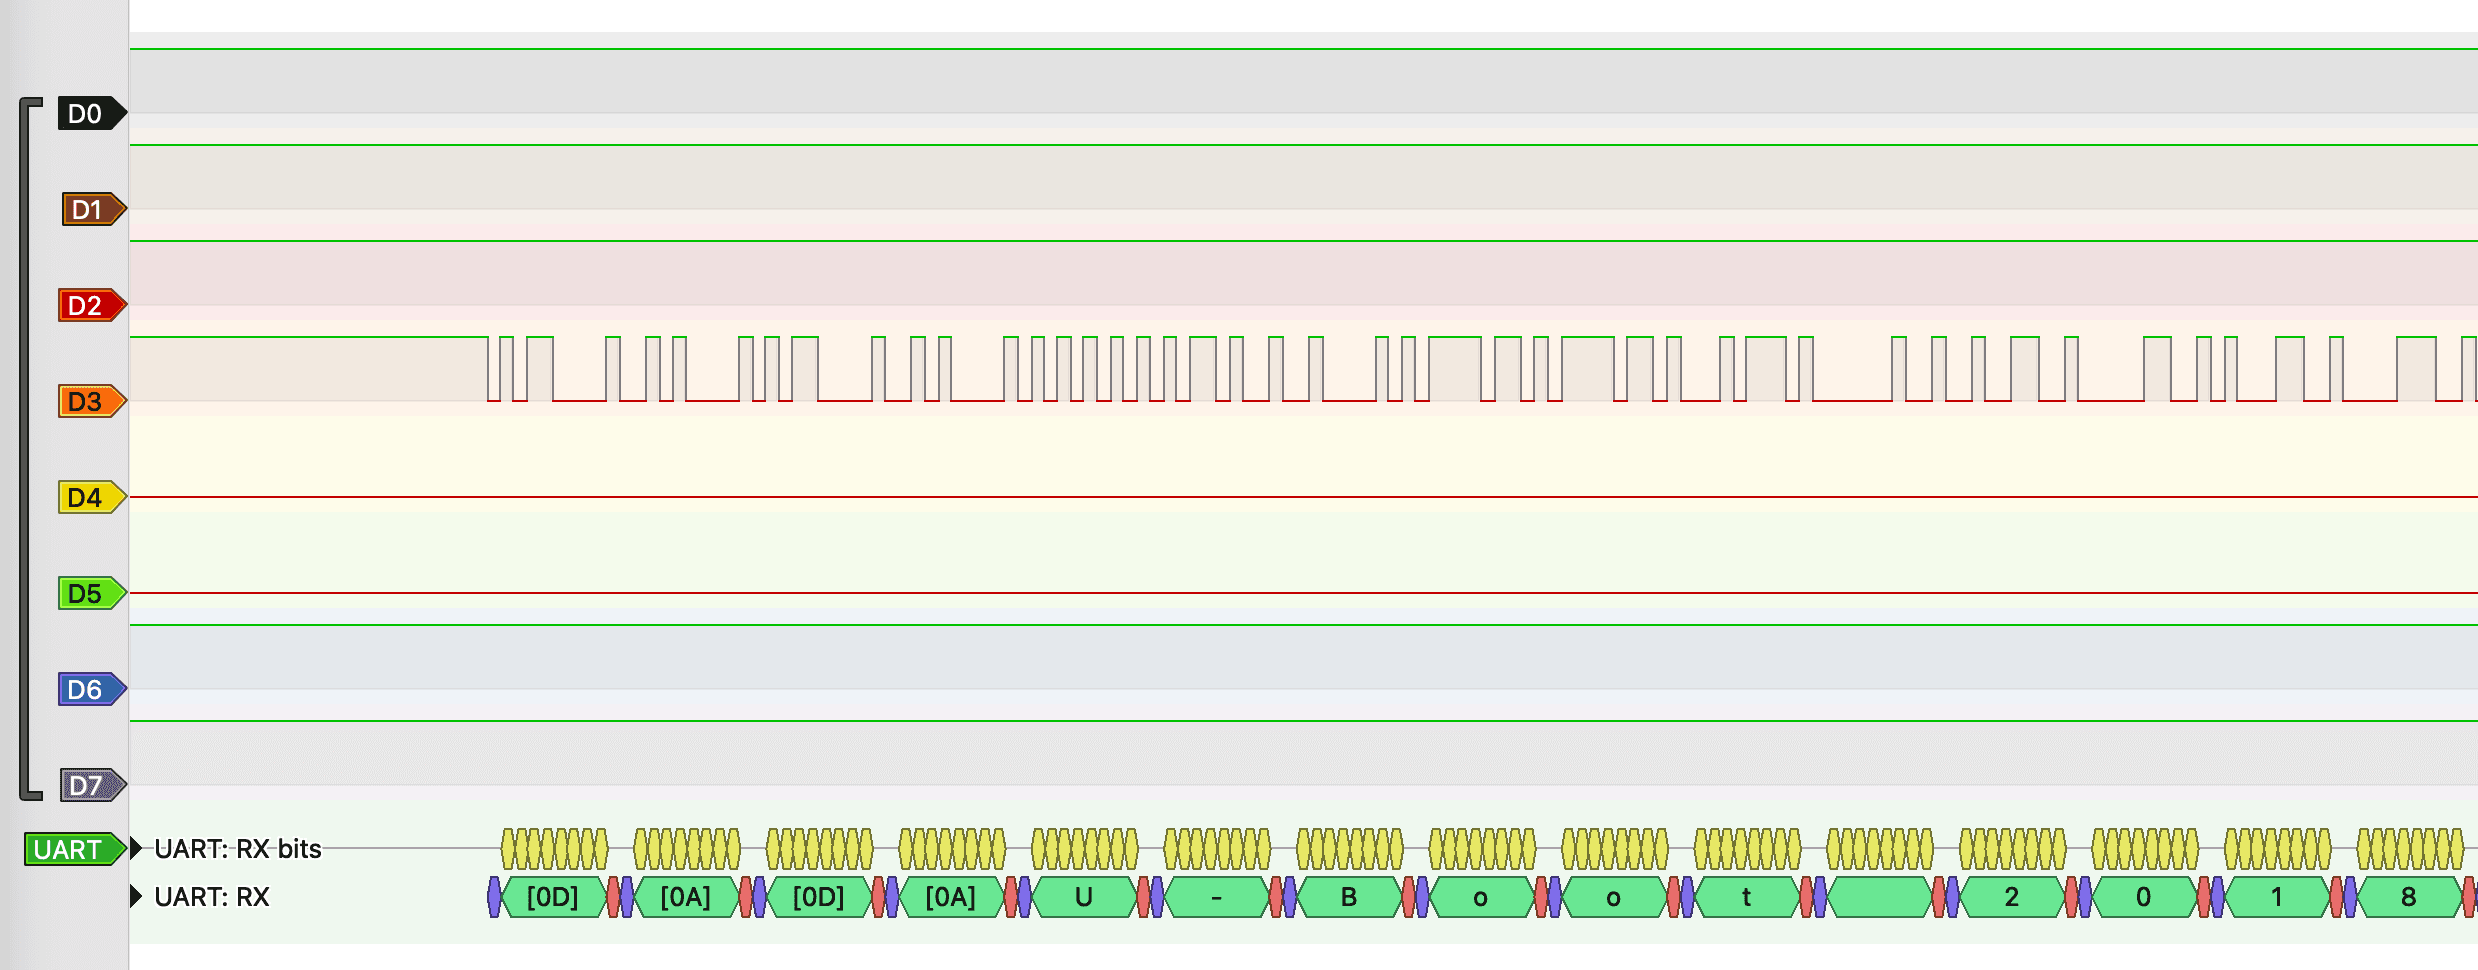
Bingo.
I hooked up my UART-TTY device and at long last was greeted with a device console.
I spent some time dumping the flash to browse the file system on the board and look through the files for different vulnerabilities. At first I was searching for a backdoor that would allow anybody to log into the hub without needing to hook up a UART, but I came up empty. Well, not empty. What I did find was a "convenient" backdoor that Sleep Number can use to SSH back into the hub (and my internal home network as a result). Likely it is to perform maintenance on the hub as needed, but the paranoid part of me was not happy when I found that. Regardless of if you choose to follow this guide or are just reading for fun, I highly recommend you disconnect the wifi on your hub and only use bluetooth controls as much as possible. That being said, for those willing to do a little hardware work, setting up local network access is straightforward, and the rest of this post will detail the steps you need to follow to do so on your own hub.
This guide will also be useful for anybody who purchased a used hub from somebody else, only to find out that Sleep Number refuses to connect to it without an associated order number. The only extra requirement is to add a bam-init.conf file to the USB drive to provide network details to the hub (probably, I haven't tested that process yet).
Pre-Requisites
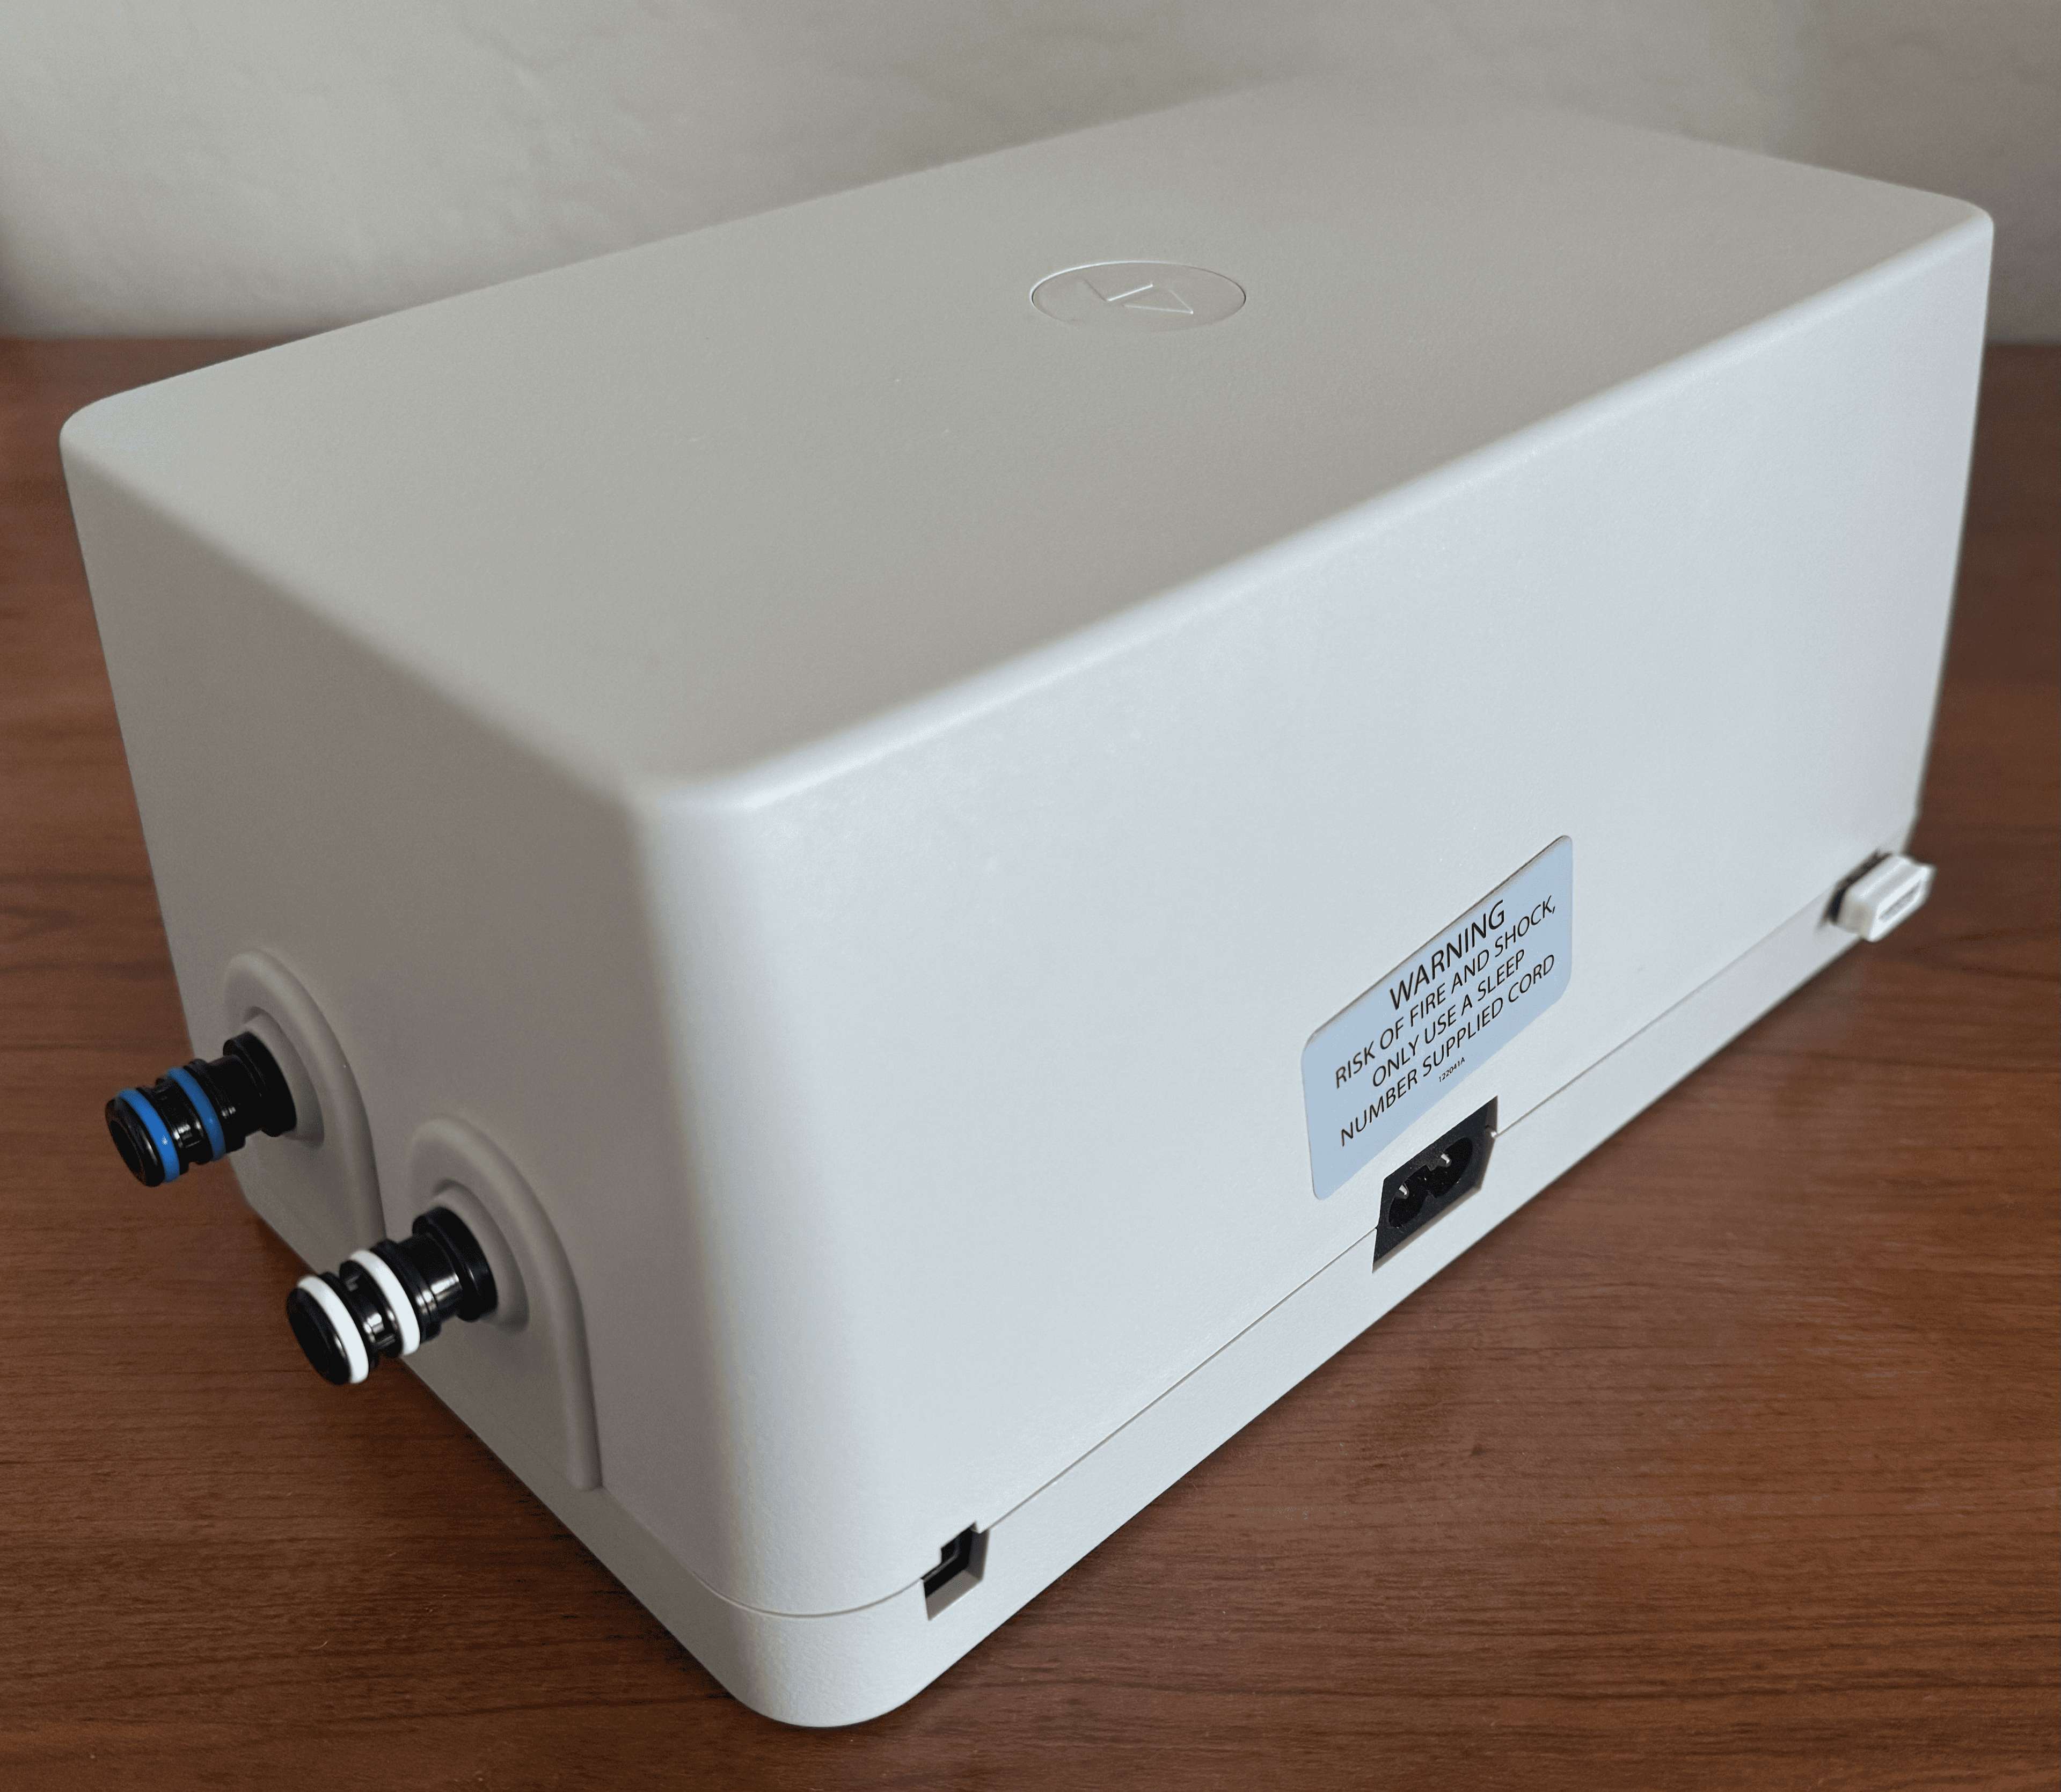
This process was performed on Sleep Number Hub with model number: 360SIQ01D. It looks like this:
You will also need a UART to TTY device and some other hardware tools.
| Item | Description | Price | Paid Link |
|---|---|---|---|
| USB-C to UART | This is the device I used because it is USB-C and less than $10 (at the time of writing) | $9.99 | https://amzn.to/3xr1rBk |
| USB-A to UART | There are also plenty of USB-A options, such as this one from the same company | $13.99 | https://amzn.to/3RAmHeR |
| Raspberry Pi Pico W | Another option is to buy a Raspberry Pi Pico W and install it inside the case permanently, so you can easily remotely connect to the console in case the SSH ever stops working1 | $11.50 | https://amzn.to/3VQ5YXh |
| 2.54mm Pin Headers | These will let you add permanent pin headers to your board | $7.99 | https://amzn.to/4c9Arp8 |
| Soldering Iron | Needed to solder the pin headers in place | $13.99 | https://amzn.to/3RzKQC4 |
| PCB Clip Clamp | A temporary alternative to the above options. You can clip this to the pin headers on the board | $13.99 | https://amzn.to/3xiuXJE |
Prices are approximate and may have changed since the time of writing.
To make it easier to connect to the board, you will want to either get the pin headers and the soldering iron or the PCB clip clamp.
You will communicate with the UART device through a serial console. On Linux or Mac, you can use minicom. On Windows, PuTTY is a good choice.
You will also need a USB-A flash drive formatted as FAT32 or Ext3.
Gaining Root Access
-
Connect your UART device to header J16 on the board.The pinout is as follows:

UART Connection - pin 1 is TX (into hub)
- pin 2 is RX (out of hub)
- pin 3 is ground
-
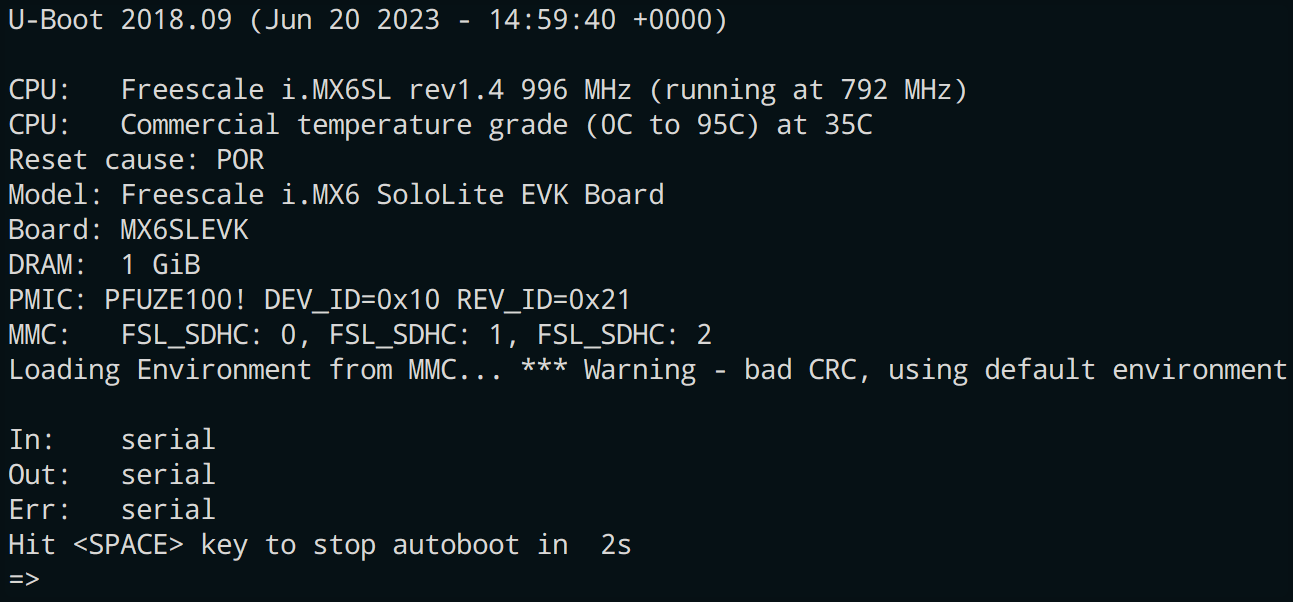
Connect your console to your UART device (minicom, etc.). The board uses a baud rate of 115200.
-
Power on your hub, you have 2 seconds to press <SPACE> to stop the auto-boot sequence.
-
Edit the boot environment variables:
-
Back up the default environment variables. Run
printenv -aand save the output somewhere you can use to recover the defaults if necessary. I have included a copy in the appendix of this post but my environment might differ from yours, so be sure to note any differences. -
Run
editenv bootcmdand remove the section that saysrun set_bootargs;(we are going to set the bootargs manually). The variable should contain the following:;;;; -
The
/initscript is stored in the hashed bootrom, so we can't modify it without flashing an entirely new bootloader. Instead, we will do a runtime modification using thebootargsenvironment variable. Runeditenv bootargsand add the following:By default, the script is looking for an encrypted file that decrypts to the
let_me_rootphrase. We replaced the decryption line with the decrypted value so we can bypass the encryption requirement2. -
When everything looks correct, make the changes persistent with
saveenv. You can try booting once before saving to make sure everything still works but you will need to repeat the above steps the next time you boot if you don't save the environment.
-
-
For the first boot, you will need to insert a flash drive with a file named "let_me_root" on it. If your hub already has what appears to be a flash drive inserted, it is likely a Wi-Fi dongle that will cause a boot loop if it is not present. You will need a USB hub that allows you to connect multiple USB drives at once to get around this issue (just for the first boot). You can boot from the u-boot menu by running
run bootcmd. Once you are booted, you should see the following output in the console:Starting OpenBSD Secure Shell server: sshd done. Starting ntpd: done Starting crond: OK INIT: no more processes left in this runlevelAt this point, if everything worked, you should be able to hit the enter key and see
root@bam-se:~#.If you do not see this, double-check the
bootargsand make sure they match the example above. Also make sure your flash drive has thelet_me_rootfile in place (its format should be FAT32 or EXT3, I don't know if any other formats will work but I know these will). -
Once you have the prompt, we will make it persistent without needing the flash drive
- Remount the root partition as rw:
- Add the
let_me_rootfile: - Remove the flash drive, reboot, and verify you still have console access.
- Remount the root partition as rw:
-
Next, we will finish getting SSH access by adding a public key to the authorized_keys file
- If you haven't already, generate an SSH key on the machine you want to connect from. I recommend generating an
ecdsakey: - Make sure the root partition is mounted as rw, then run the following (substituting in your public key contents):
- Test SSH access with
ssh root@$hub_ip -i <path to id_ed25519>. You should be able to connect at this point. - If you are not connected, verify the contents of the
authorized_keysfile is formatted correctly (there should be two keys in the file).
- If you haven't already, generate an SSH key on the machine you want to connect from. I recommend generating an
Congratulations, you now have root access!
Creating a Local Network Control and Monitoring Server
By itself, root access is great but doesn't do much for us. We want to be able to replicate the controls provided by the app so we can control the bed over our local network instead.
The hub includes Python 2.7.18. While extremely old (keep in mind the Hub appears to have been last updated in 2018), it includes the simpleHTTPServer package, which will give us all the capability we need to remotely control and monitor the bed over the local network.
On your local machine, create a python file named script_server.py:
import os
import subprocess
import BaseHTTPServer
from urlparse import urlparse, parse_qs
SCRIPT_DIR = '/bam/scripts'
parsed_path =
script_name = parsed_path
script_path = os
if os:
# Gather all 'arg' query parameters into a list
query_args =
args = query_args
# Run the script with the arguments requested
output = subprocess
self
self
self
else:
self
self
self
server_address = ('', 8000) # Listen on all interfaces, port 8000
httpd =
httpd
if __name__ == "__main__":
This script sets up an HTTP server that can run any of the scripts in /bam/scripts. You can provide arguments to the scripts with the query argument arg like so: ?arg=value1&arg=value2...&arg=valueN. The result will be displayed in the browser.
Make sure you remounted the root partition as rw since the last reboot, then copy this script to the hub:
At this point, you can run the script and test it out, but it won't auto-start when you reboot the hub. One method of auto-starting the script would be to tack it onto one of the other startup scripts (initBAM seems like a good candidate). Another option is to add an rc.d script so it gets started by the OS. However, there is a snag—the /etc directory is copied from disk and stored in RAM on the system you log in to, so if we want to write to the disk where the original version lives, we will need to do a few extra steps.
Adding rc.d Scripts to the /real.root Partition Stored on Disk (Outside the chroot)
The running OS instance is actually running inside a chroot that is set up by the bootloader /init script with many of the system files stored in a tmpfs partition so they can't be modified directly (past a reboot at least). However, we can mount the original partition and modify the files there, so they will be properly copied into place after we reboot.
First, create the following file on your local system named script_server.sh:
## BEGIN INIT INFO
# Provides: script_server
# Required-Start: $remote_fs $syslog
# Required-Stop: $remote_fs $syslog
# Default-Start: 2 3 4 5
# Default-Stop: 0 1 6
# Short-Description: Start daemon at boot time
# Description: Enable service provided by daemon.
## END INIT INFO
Copy it to the hub the same as you did the python script previously.
Next, we will move it into place in the pre-init system. Run the following commands to get the disk mounted properly:
Now we will move the script to its proper home and add the necessary symlinks:
Once it finishes rebooting, try pointing your browser at http://$hub_ip:8000/bamstat. If everything is working correctly you should see some status information about the hub displayed in your browser window.
Useful Commands
The /bio script appears to be the primary control script for the bed. You can specify commands with the url /bio?arg=XXXX. Here are some useful ones for controlling the bed:
| Command | Description |
|---|---|
arg=PSNL | Get the last set sleep number value for the left bed side |
arg=PSNR | Get the last set sleep number value for the right bed side |
arg=PSNl | Get the current sleep number value for the left bed side |
arg=PSNr | Get the current sleep number value for the right bed side |
arg=PSNX | Get the last set and current sleep number values for both bed sides |
arg=PSNS&arg=L100 | Set the sleep number for the left bed side to 100 (L or R for side and 5..100 for value) |
arg=SPAU | Get the bed privacy setting |
arg=SPAU&arg=on | Set the bed privacy setting (off to disable) |
arg=LBPL | Get the presence value for the left side |
arg=LBPR | Get the presence value for the right side |
arg=LBPX | Get the presence value for both sides |
arg=LRSG | Get the responsive air setting for both sides |
arg=LRLE&arg=on | Set the responsive air setting for the left side to on |
arg=LRRE&arg=off | Set the responsive air setting for the right side to off |
arg=MFST | Get the head and foot position for both sides |
arg=MFUL&arg=100&arg=0 | Set the head position for the left side (0..100 for the position. The second argument is speed, 0=fast, 1=slow) |
arg=MFUR&arg=100&arg=0 | Set the head position for the right side |
arg=MFFL&arg=100&arg=0 | Set the foot position for the left side |
arg=MFFR&arg=100&arg=0 | Set the foot position for the right side |
arg=MFO3 | Get the right underbed light status (if you have a bed with other outlets or lights, MFO1..4 all work) |
arg=MFSO&arg=IBT3 | Set the outlet values, I=index<1=R, 2=L, 3=R-under, 4=L-under, 5=Both, 6=Both-under, 7=All, 8=All-R, 9=All-L>; B=brightness<0=off, 1=on/bright, 2=dim, 3=moderate> T=timer<0-180>. Timer is optional |
arg=MUAS&arg=on | Enable or disable the auto setting for the underbed light (off to disable) |
arg=FWGL | Get the footwarming level and timer for the left side |
arg=FWGR | Get the footwarming level and timer for the right side |
arg=FWSL&arg=100&arg=360 | Set the footwarming level and timer for the left side (level is 0..100 and timer is 0..360) |
arg=FWSR&arg=100&arg=360 | Set the footwarming level and timer for the right side |
arg=SBAS | Baseline the bed |
There are many other controls in the bio script, such as getters and setters for foundation presets, snore configuration, DualTemp controls, and status information (watch out for the more destructive commands such as factory reset or the radio controls). You can explore the script to find all the available commands: if you point your browser at /bio?arg=help, you will see a list of the commands you can run. If you add a command as a second argument to the help call, it will provide detailed information for that command.
Next Steps
There are a few things to explore in the OS now that you have access:
-
The bed control functionality is all in the
/bamroot directory. You can explore the various scripts contained there and learn how the hub operates. -
I spent some time exploring the system to find a backdoor that doesn't require UART access but it appears (fortunately) that the developers covered their tracks pretty well and shut down all the obvious access channels I could think of. If anybody finds something I might have missed, I would love to hear about it.
-
The hub communicates with the Sleep Number servers by opening an SSH tunnel and providing a reverse tunnel back to the hub that their developers can use to connect to the hub and do maintenance when needed. The idea that unknown users can directly connect to my internal home network is a scary thought, so I will probably be disconnecting the hub from the external internet once I am satisfied with my internal network control script. It also makes me wonder how many other internet-connected appliances include a similar backdoor into the home network like this one has.
-
It might be fun to write a simple progressive web app to control the bed settings that can directly replace the SleepIQ app.
If anybody has any feedback, please reach out! I would love to hear from you.
Appendix: Original U-Boot Env Variables on My Hub
;;;;;
;;
; then ; else ;fi
Footnotes
-
Setting this up is left as an exercise for the reader ↩
-
This encrypted file is a key-hole the developers put in place to grant both console and SSH access to the hub. If the original encrypted file were to be obtained or reverse-engineered, most of this process would not be necessary. ↩
-
On my version of the
bioscript, theMFSOlines were in the wrong order in theLISTand couldn't be called. I had to move them up a couple rows to get them to work. ↩